OpenClaw in PlugOS: The Safer Way to Run AI
 The Easiest Installation Guide – Step by Step for Beginners
As a powerful open-source AI assistant, OpenClaw allows anyone to run and control their own large language models locally. However, precisely because of its openness and flexibility, it also brings numerous security vulnerabilities and uncontrollable factors—unauthorized access, token leakage risks, port exposure hazards… These issues are often difficult for average users to detect, let alone prevent.
Is there a way to enjoy the power of OpenClaw while avoiding these risks?
Yes. Installing and using OpenClaw within PlugOS is an excellent way to balance the pros and cons. Through containerized isolation, permission controls, and network restrictions, PlugOS provides a relatively secure operating environment for OpenClaw—allowing you to freely explore the infinite possibilities of AI without constantly worrying about security concerns.
This guide will walk you through, step by step, how to safely and stably install and configure OpenClaw within PlugOS.
1. Download the latest APK from Releases:
https://github.com/mithun50/openclaw-termux/releases
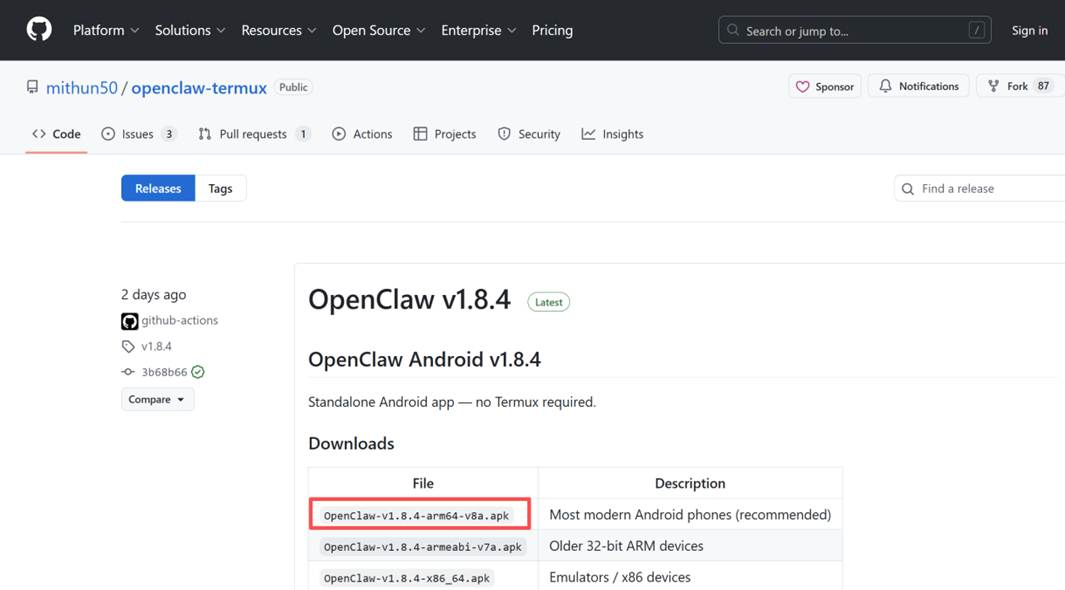
2. Install the OpenClaw app. P.S. You can transfer the APK file via Shared Folder.
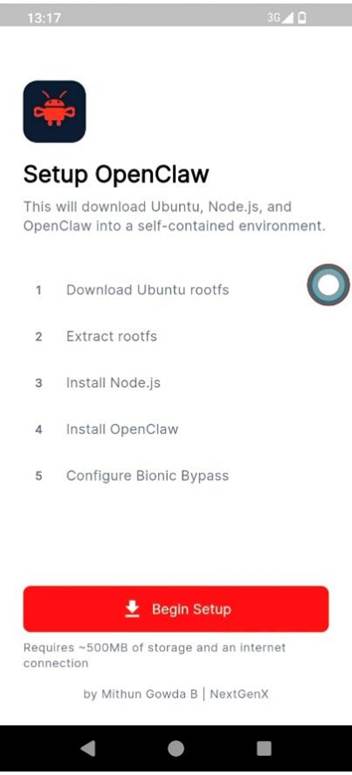
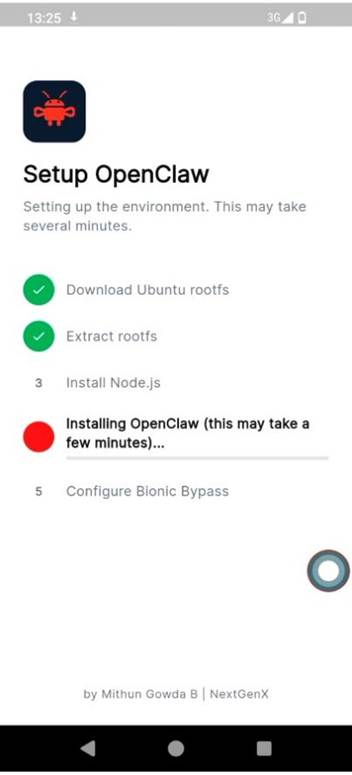
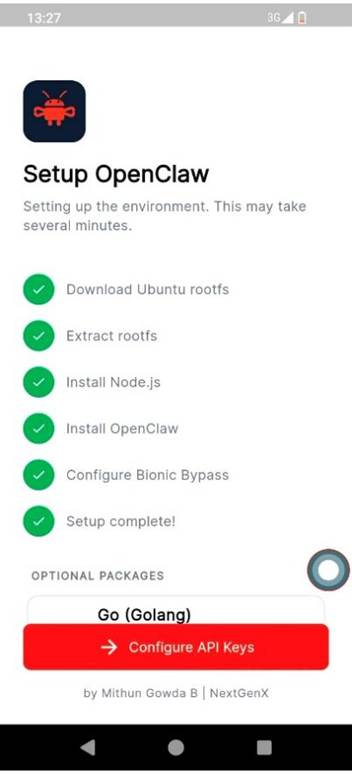
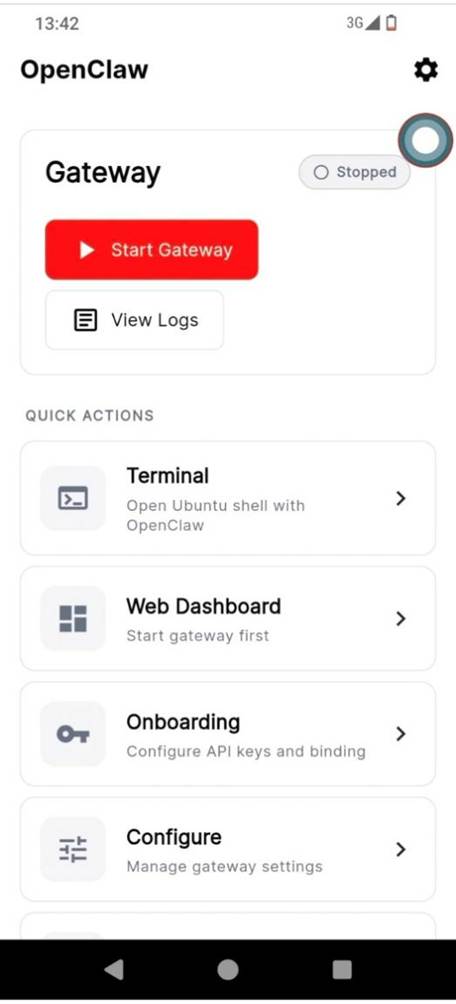
3. Open the app and click the Begin Setup button
4. Click Configure API Keys after setup is complete
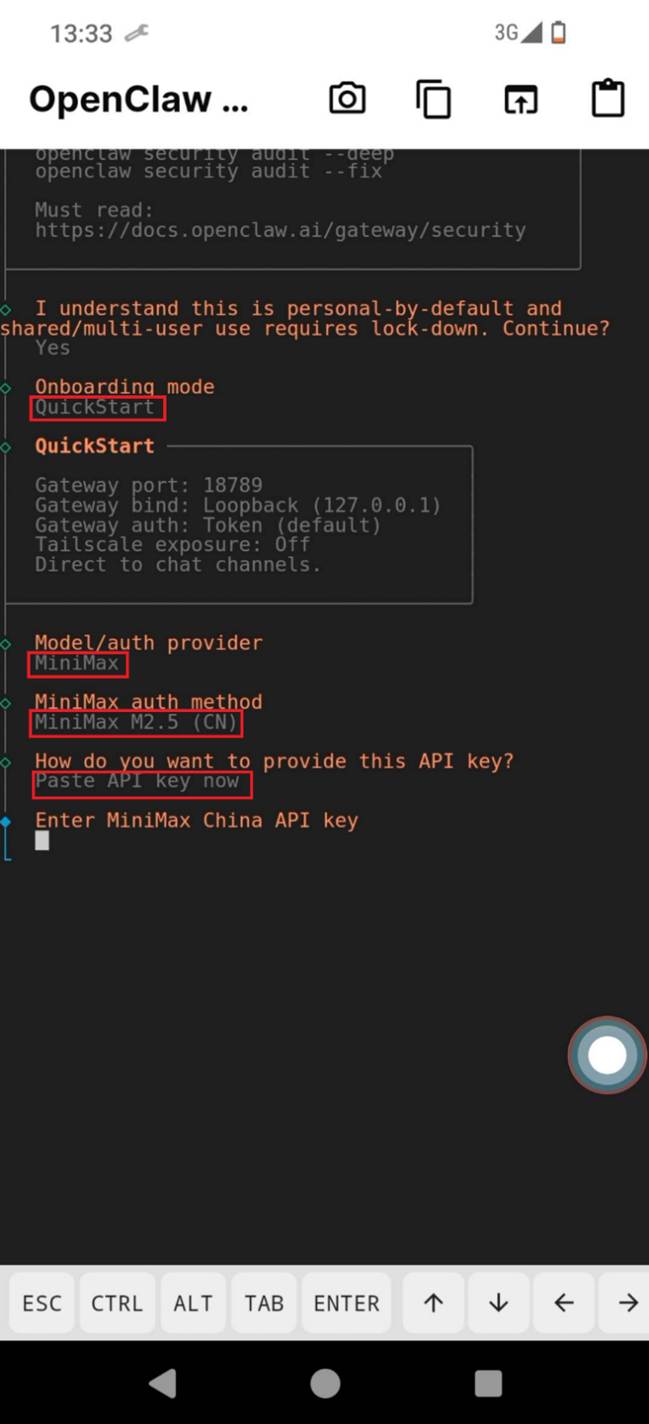
5. Select and click ENTER for the following options:
l Continue? [Yes]
l Onboarding mode [Quick Start]
l Model / auth provider [MiniMax]
l MiniMax auth method [Mnimax M2.5(CN)]
l How do you want to provide this API key? [Paste API key now]
6. Here we need to get an API key
1)Open the official MiniMax Open Platform website using a browser. Register and log in to your account. After completing Alipay real-name authentication, you can receive a 15 RMB coupon.
👉 https://platform.minimaxi.com/user-center/basic-information
2)In the console, find the page named “API Key Management” or something similar.
 3)Click “Create New API Key”, and the system will generate a secret key starting with “sk-xxxx” .

Important: Copy this key and save it somewhere safe (you may not be able to see it again after closing the page).
7. Let’s continue:
l API Key [Paste the key, e.g., sk-xxx]
l Default model [Keep current (minimax-cn/MiniMax-M2.5)]
[Upload failed]
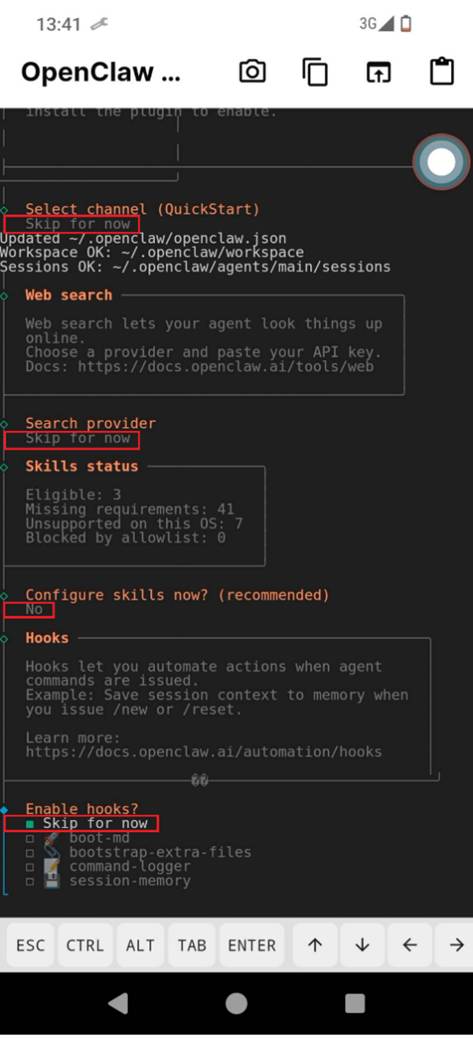
l Select channel [Skip for now]
Channel refers to which app will be used to talk with OpenClaw, e.g. Telegram、Lark、iMessage…you can also do this later via the web view. So let’s skip for these setup. The same as following.
l Search for provider [Skip for now]
l Configure skills now [No]
l Enable hooks [Skip for now]
8. Setup is complete when the message pops up: “Onboarding complete. Use the dashboard link above to control Openclaw.”
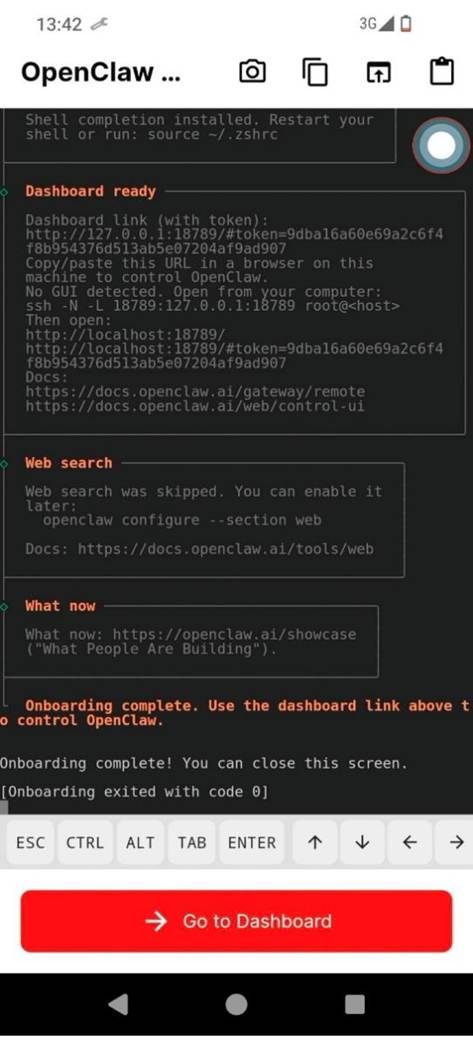
9. Click Go to Dashboard button
10. Click Start Gateway button on Openclaw front page
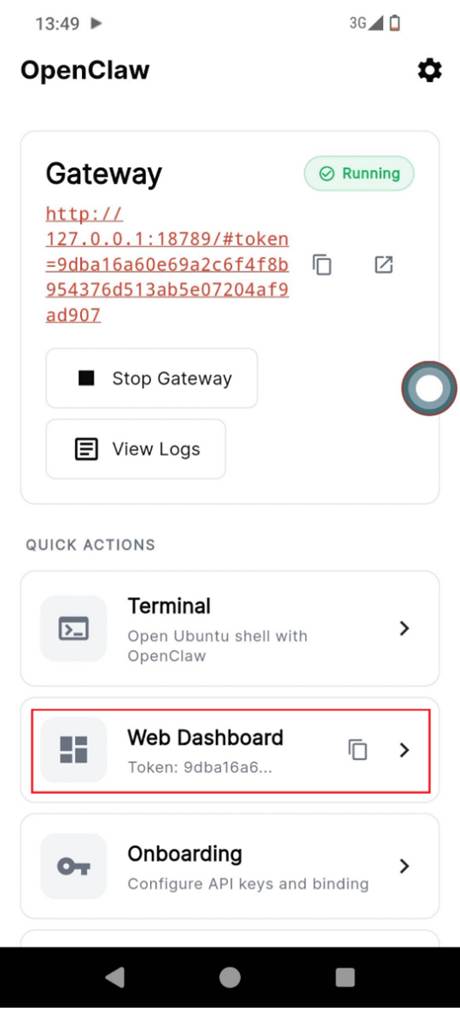
11. Few minutes later, we can see the link like *https://127.0.0.1:18789/#token=xxxx,*click Web Dashboard button
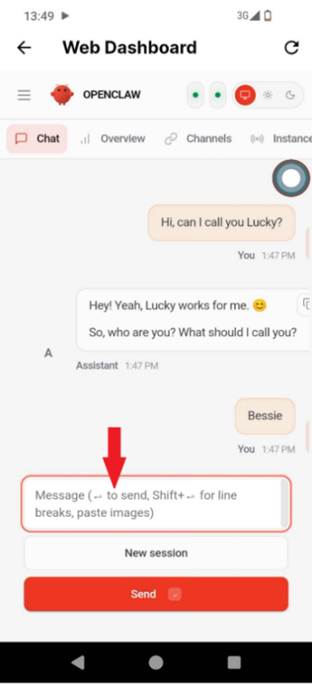
12. You should now see the web interface like below — and you can start using your AI assistant ~!